Quickstart
Ship your first agent task in five steps.
Key concepts
The vocabulary, in two minutes.
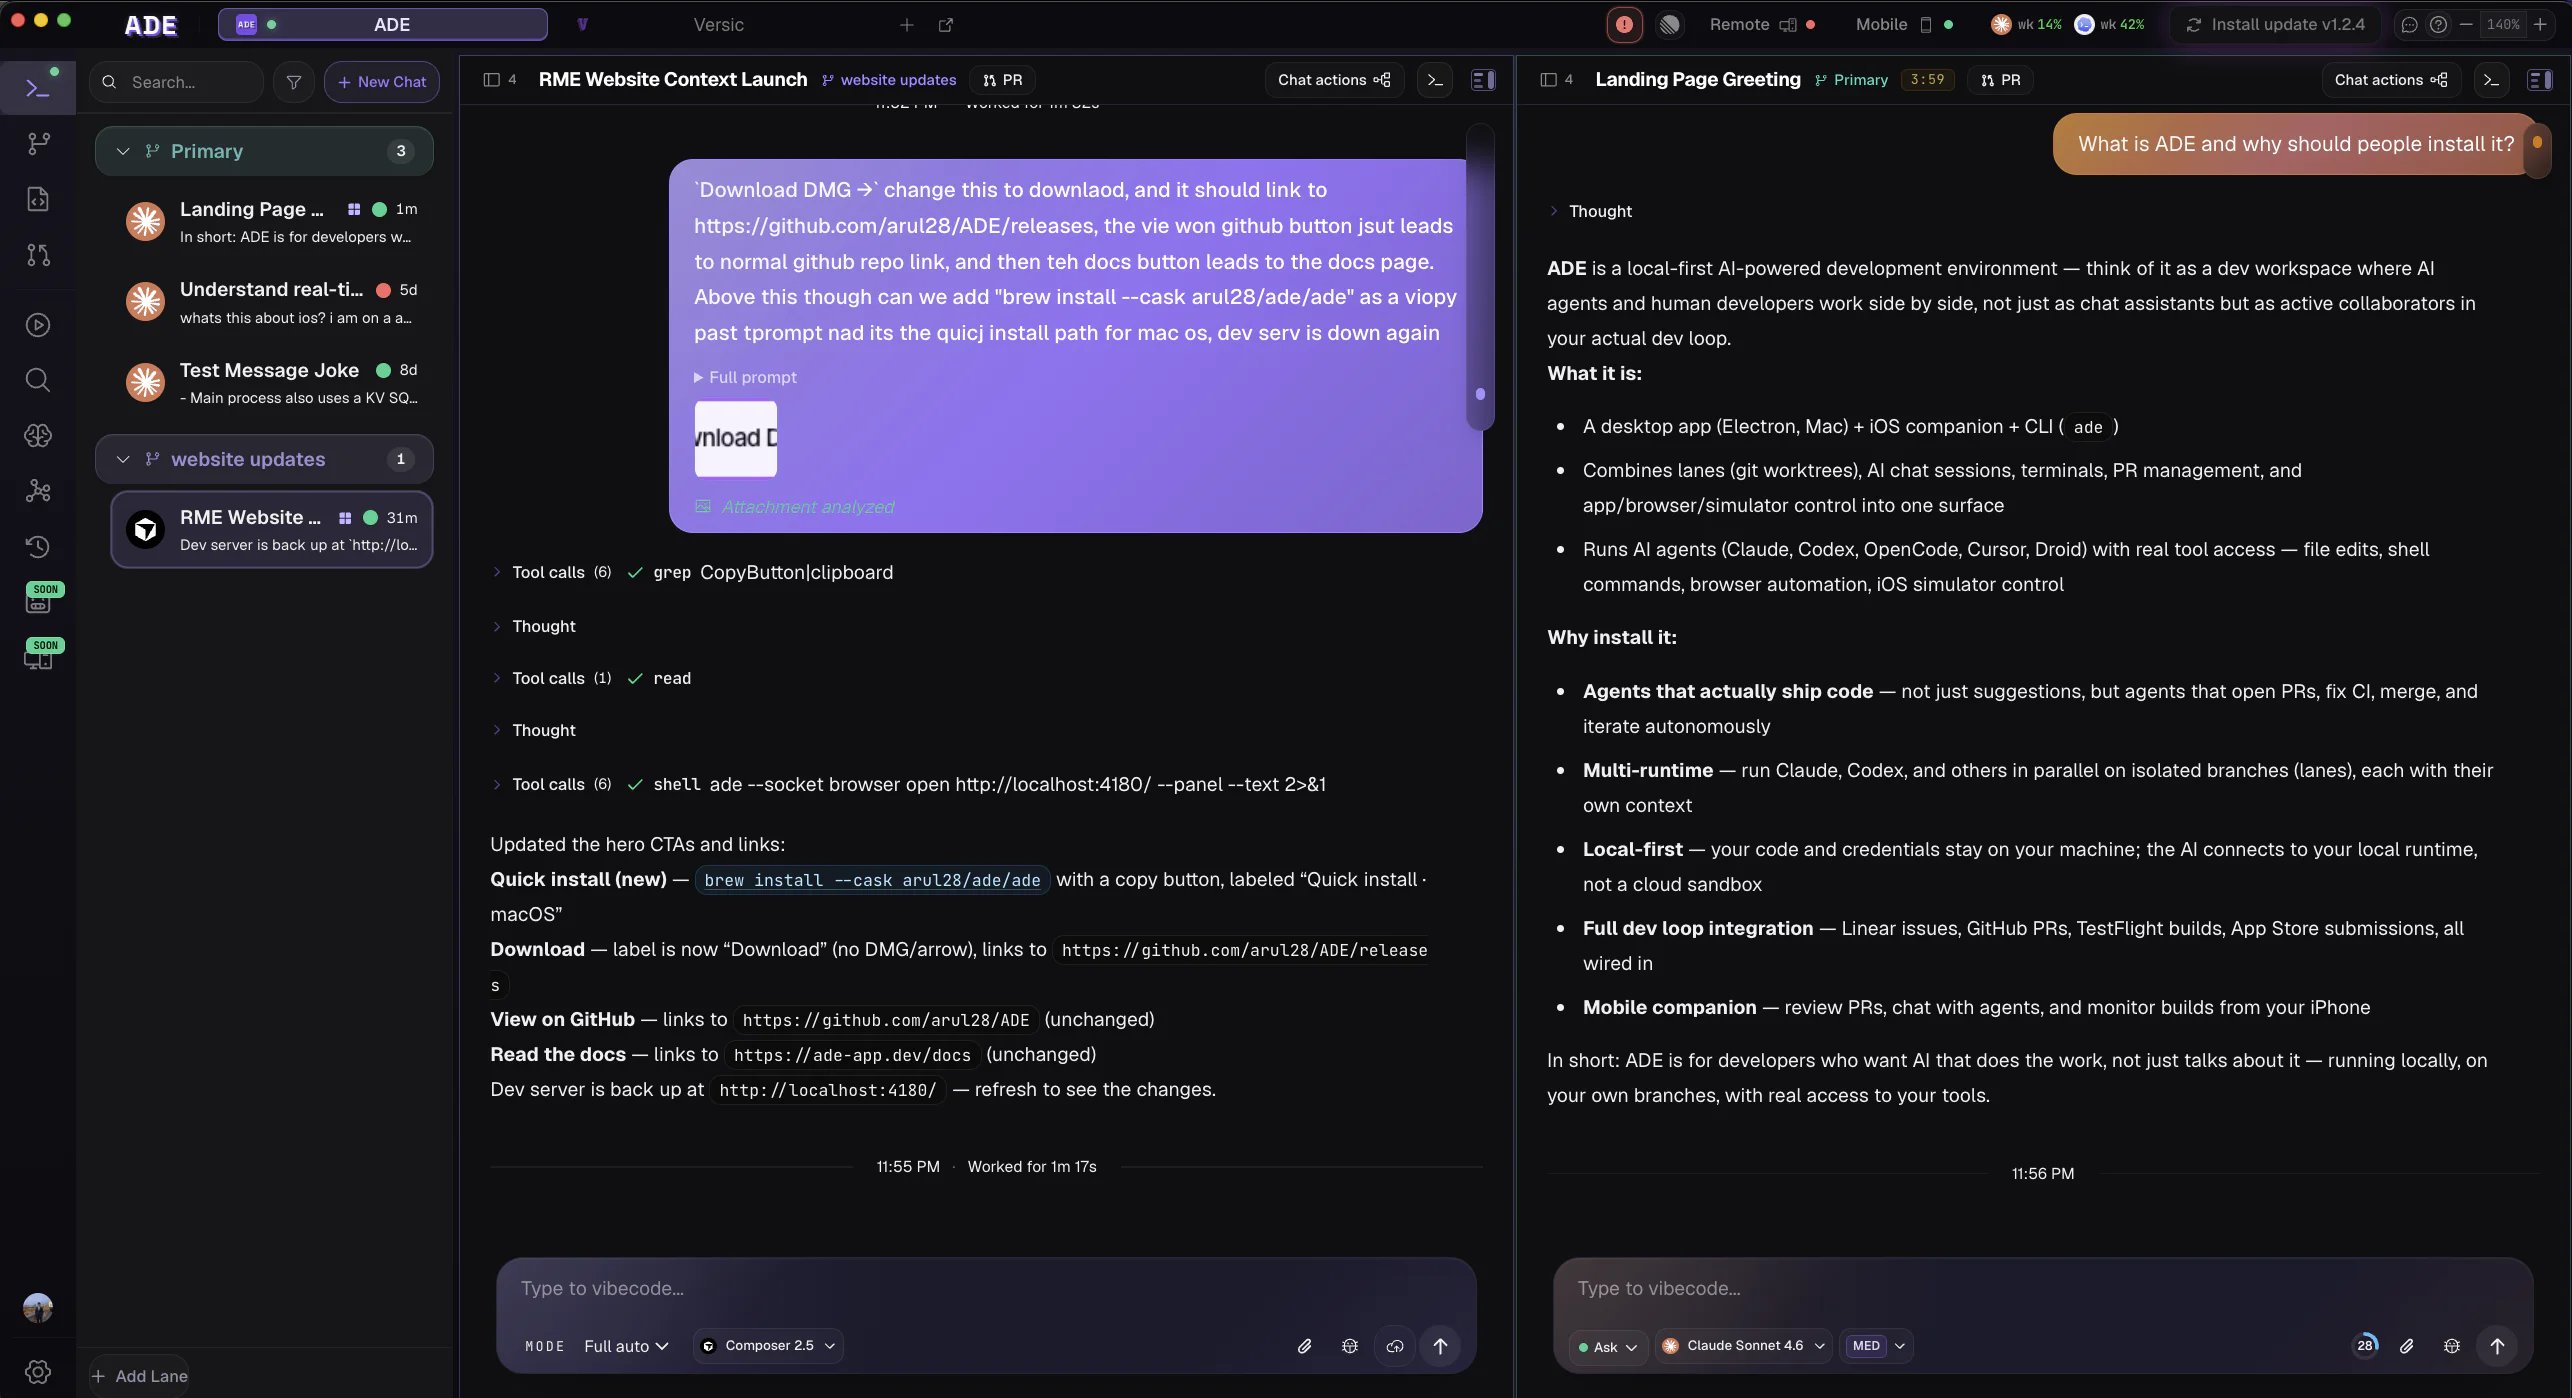
Download for Mac
Free, open source. macOS 13+.
Download for iOS
Install the ADE companion app from TestFlight.
What you get

Parallel lanes
Every task gets its own git worktree — its own branch, files, and sessions. Agents work side by side, no stashing, no context switch.

Every agent, one chat
Claude Code, Codex, Cursor, Factory Droid, and OpenCode — pick the model per task, all against the same lane with live diffs and approval gates.

Open, review, merge PRs
Every PR your agents open lands in ADE — diff, CI, comments, merge button. No GitHub tab. Auto-merge when green.

Tools, in context
A built-in browser, Files, Git, and the iOS simulator live right next to your chat, so the agent works against what you see.
One workspace, every surface
The same lanes, chats, and PRs follow you across the desktop app, the terminal, and your phone — backed by the same machine in real time.- Desktop
- Terminal
- iOS
The full control plane on macOS.

The usual loop
1
Open a repository
ADE creates local project state under
.ade/ and leaves your source tree under Git’s control.2
Create a lane
A lane is ADE’s name for a git worktree — an isolated branch and working copy for one task.
3
Run an agent
Ask for a change in chat, launch a terminal, or hand project-wide planning to the CTO.
4
Review the result
Inspect diffs, terminal output, tests, PR state, and proof artifacts from one place.
5
Ship it
Commit, push, open a PR, and merge — without leaving ADE.
App map
Work
Agent chats, terminals, and CLI sessions across lanes, with Git, Files, Browser, and iOS tools alongside.
Lanes
Create, inspect, stack, archive, and clean up isolated worktrees.
Files
Read diffs, edit files, stage changes, and resolve conflicts.
PRs
Create and review GitHub PRs, read CI, and manage stacked work.
Graph
Lane topology, PR links, stack relationships, and merge risk.
CTO
A persistent project-level operator with durable memory that reasons across every lane.
Runs the agents you already use
ADE doesn’t replace your agent — it runs all of them, against the same worktrees, in one place.


Start small. Your first successful ADE session should be one lane, one agent, one narrow change, and one review pass.
Quickstart
Follow the shortest path to a working agent.
Key concepts
Learn the product vocabulary before going deeper.