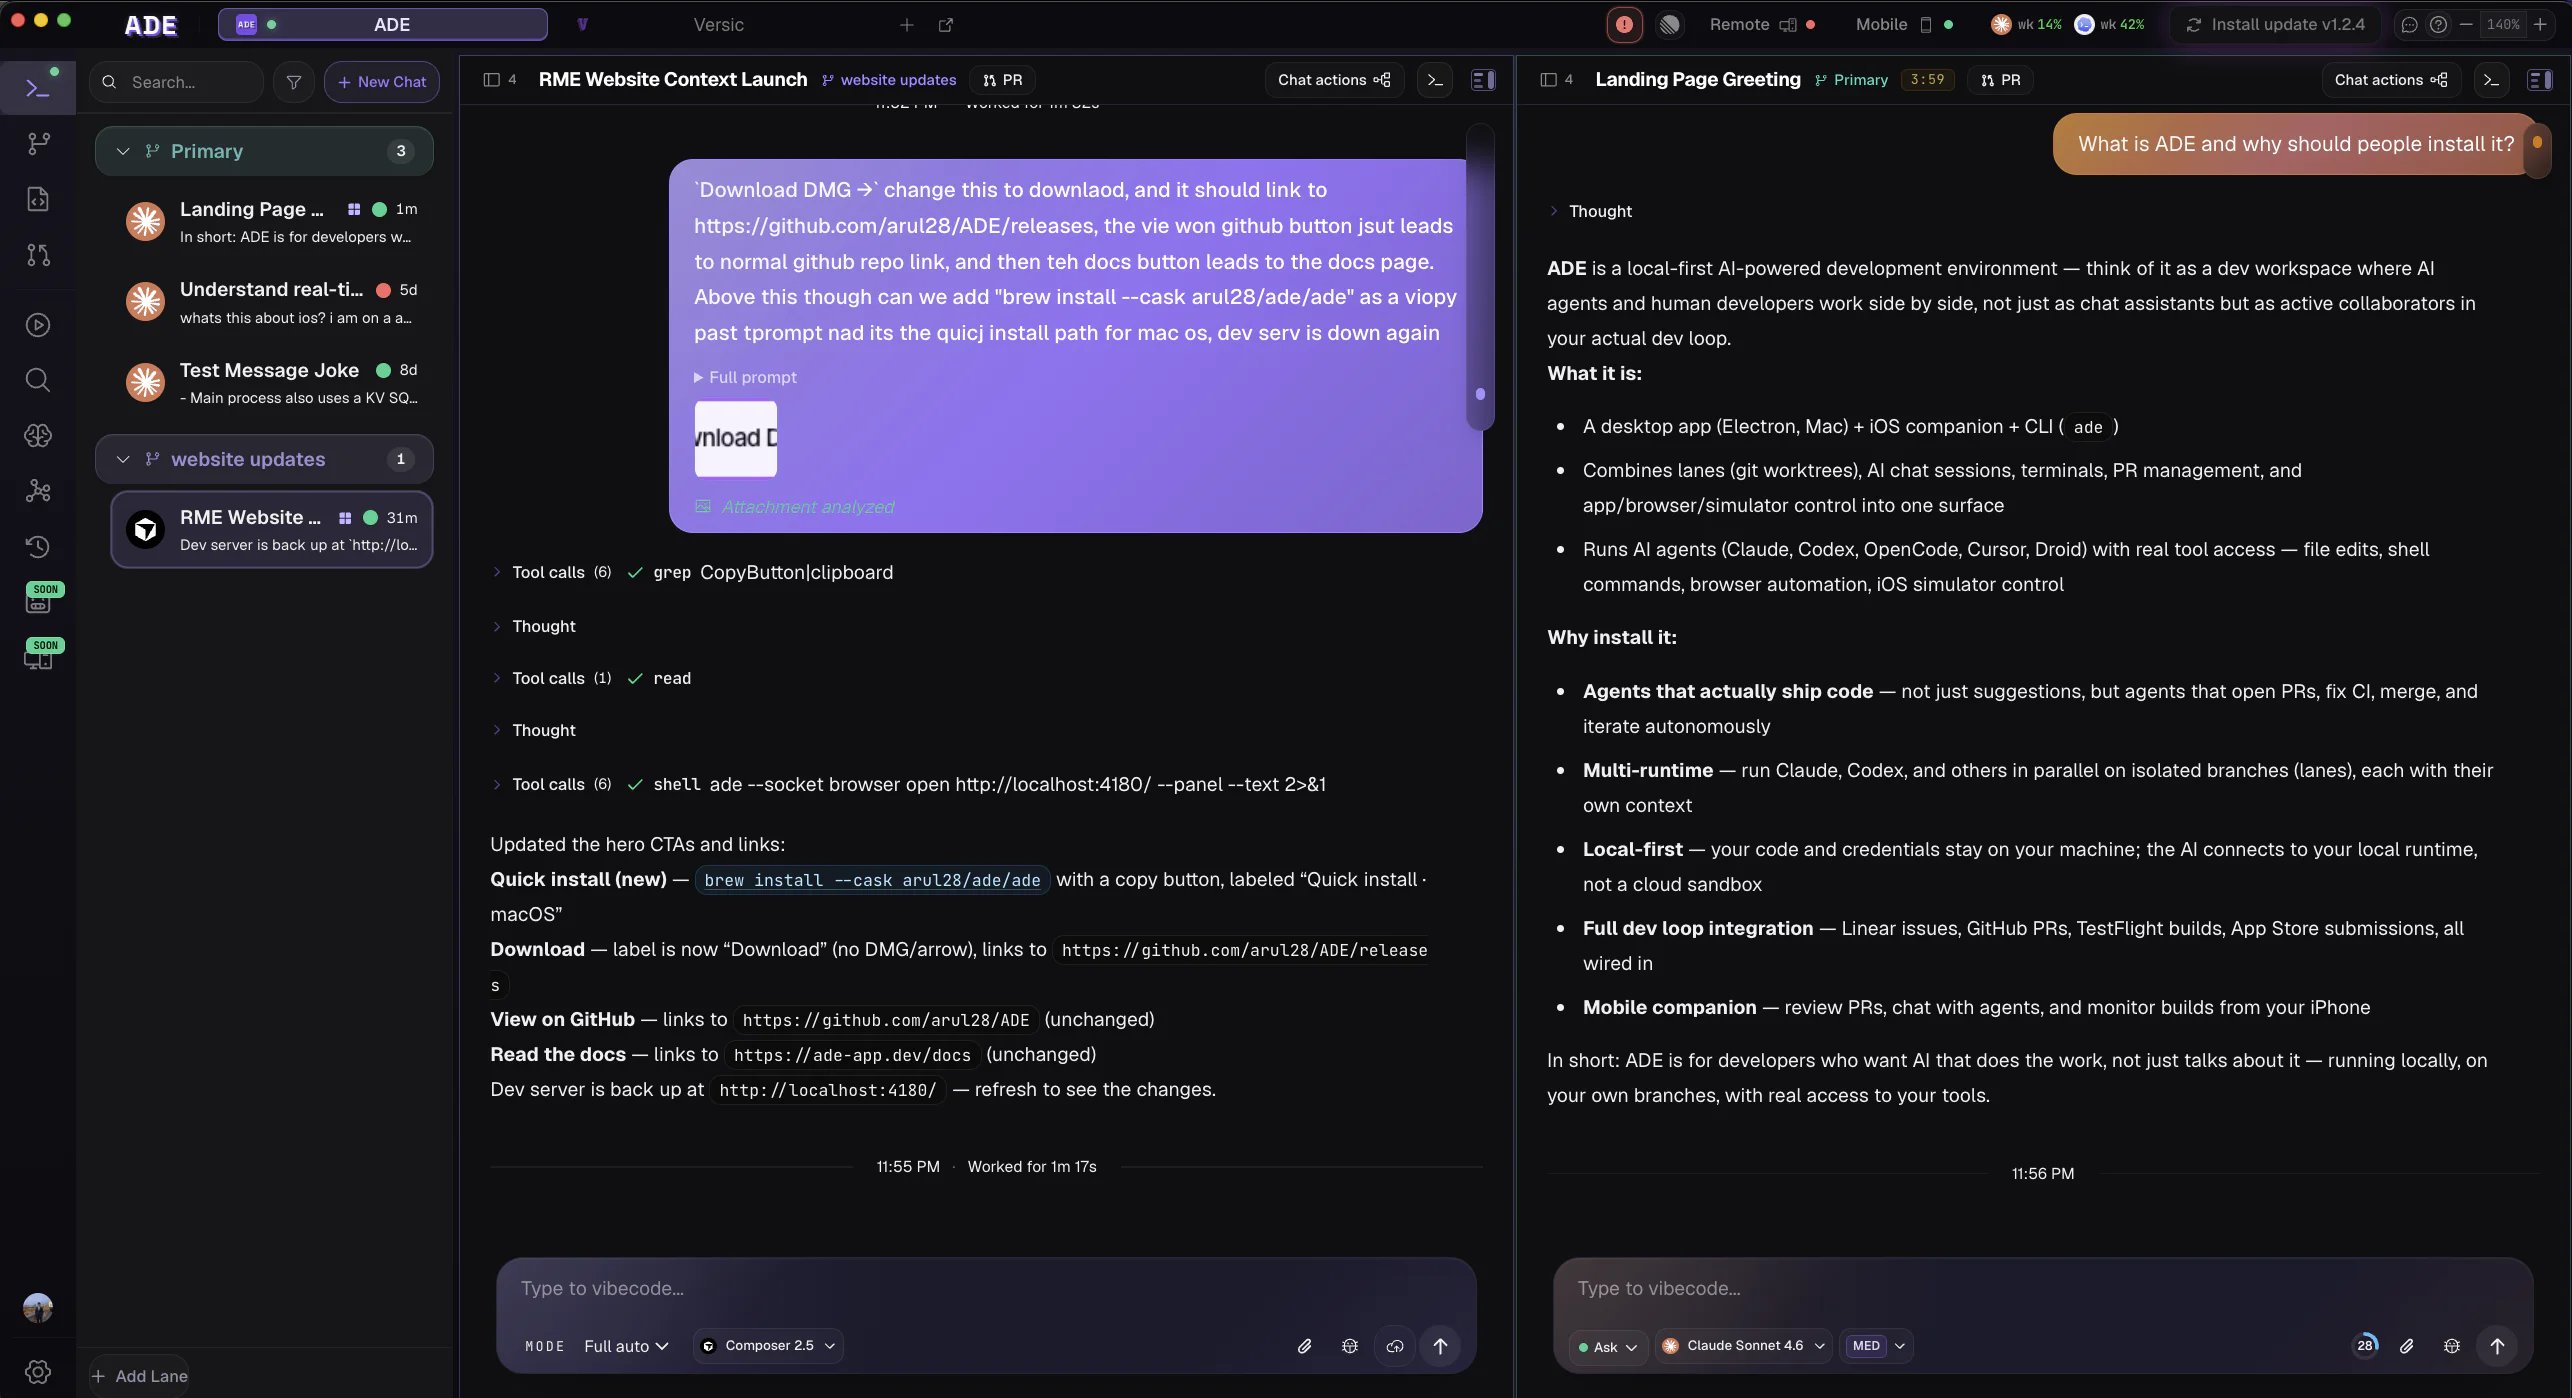
Install ADE
Download the latest macOS DMG from GitHub Releases, open it, and drag ADE.app into
/Applications.Connect one AI provider
Open Settings -> AI Providers and verify at least one provider. Claude Code, Codex, Cursor, Factory Droid, and OpenCode are the agent paths.
Open a Git repository
Use Open Repository on the welcome screen or press
Cmd+O. Choose the repository root, not a subfolder.Create a lane
In Lanes, create a new lane from your default branch. A lane is ADE’s name for a git worktree — it gets its own branch and working copy under
.ade/worktrees/, isolated from your main checkout.Ask for one small change
Open the lane in Work or Chat and send a narrow task. Start with something easy to inspect.
A good first prompt
What to read next
Key concepts
Understand the product vocabulary without reading a reference manual.
Run your first agent
More detail on choosing a provider, watching tool calls, and reviewing output.
Lanes
How ADE keeps parallel work isolated.
Pull requests
How finished lane work moves into GitHub review.